
How to upload and import CSV files in React and Node.js with UseCSV
Jun 1, 2022
Importing CSV and Excel files is a feature everyone has to build eventually. Whilst there are a handful of CSV parser libraries out there, you're left to build the UI yourself. We're going to show you how to add CSV file import with a delightful UI to your React app in just a few minutes.
What is UseCSV?
UseCSV is an all-in-one CSV import product that gives you a delightful CSV importer experience for your users. All you have to do is drop-in the UseCSV JS library, and create a webhook endpoint to receive uploads. This takes away all the headaches of building CSV import functionality in-house .
Here's a sneak peak of what the import experience will be for your users (this opens in a modal inside your app):
Here are just a few of the awesome features of UseCSV:
- React lib which adds the UseCSV import button and modal to your app
- Supports CSV and all Excel formats (xlsx, xls, xlt), including legacy Excel versions
- Handles large import files
- Includes a library of common validation rules to choose from
Without further ado, let's get started!
Setup your UseCSV account
You'll want to first grab a free UseCSV developer account. Once you've signed up and logged in, you'll see an Importer called "My First Importer" which has already been created for you.
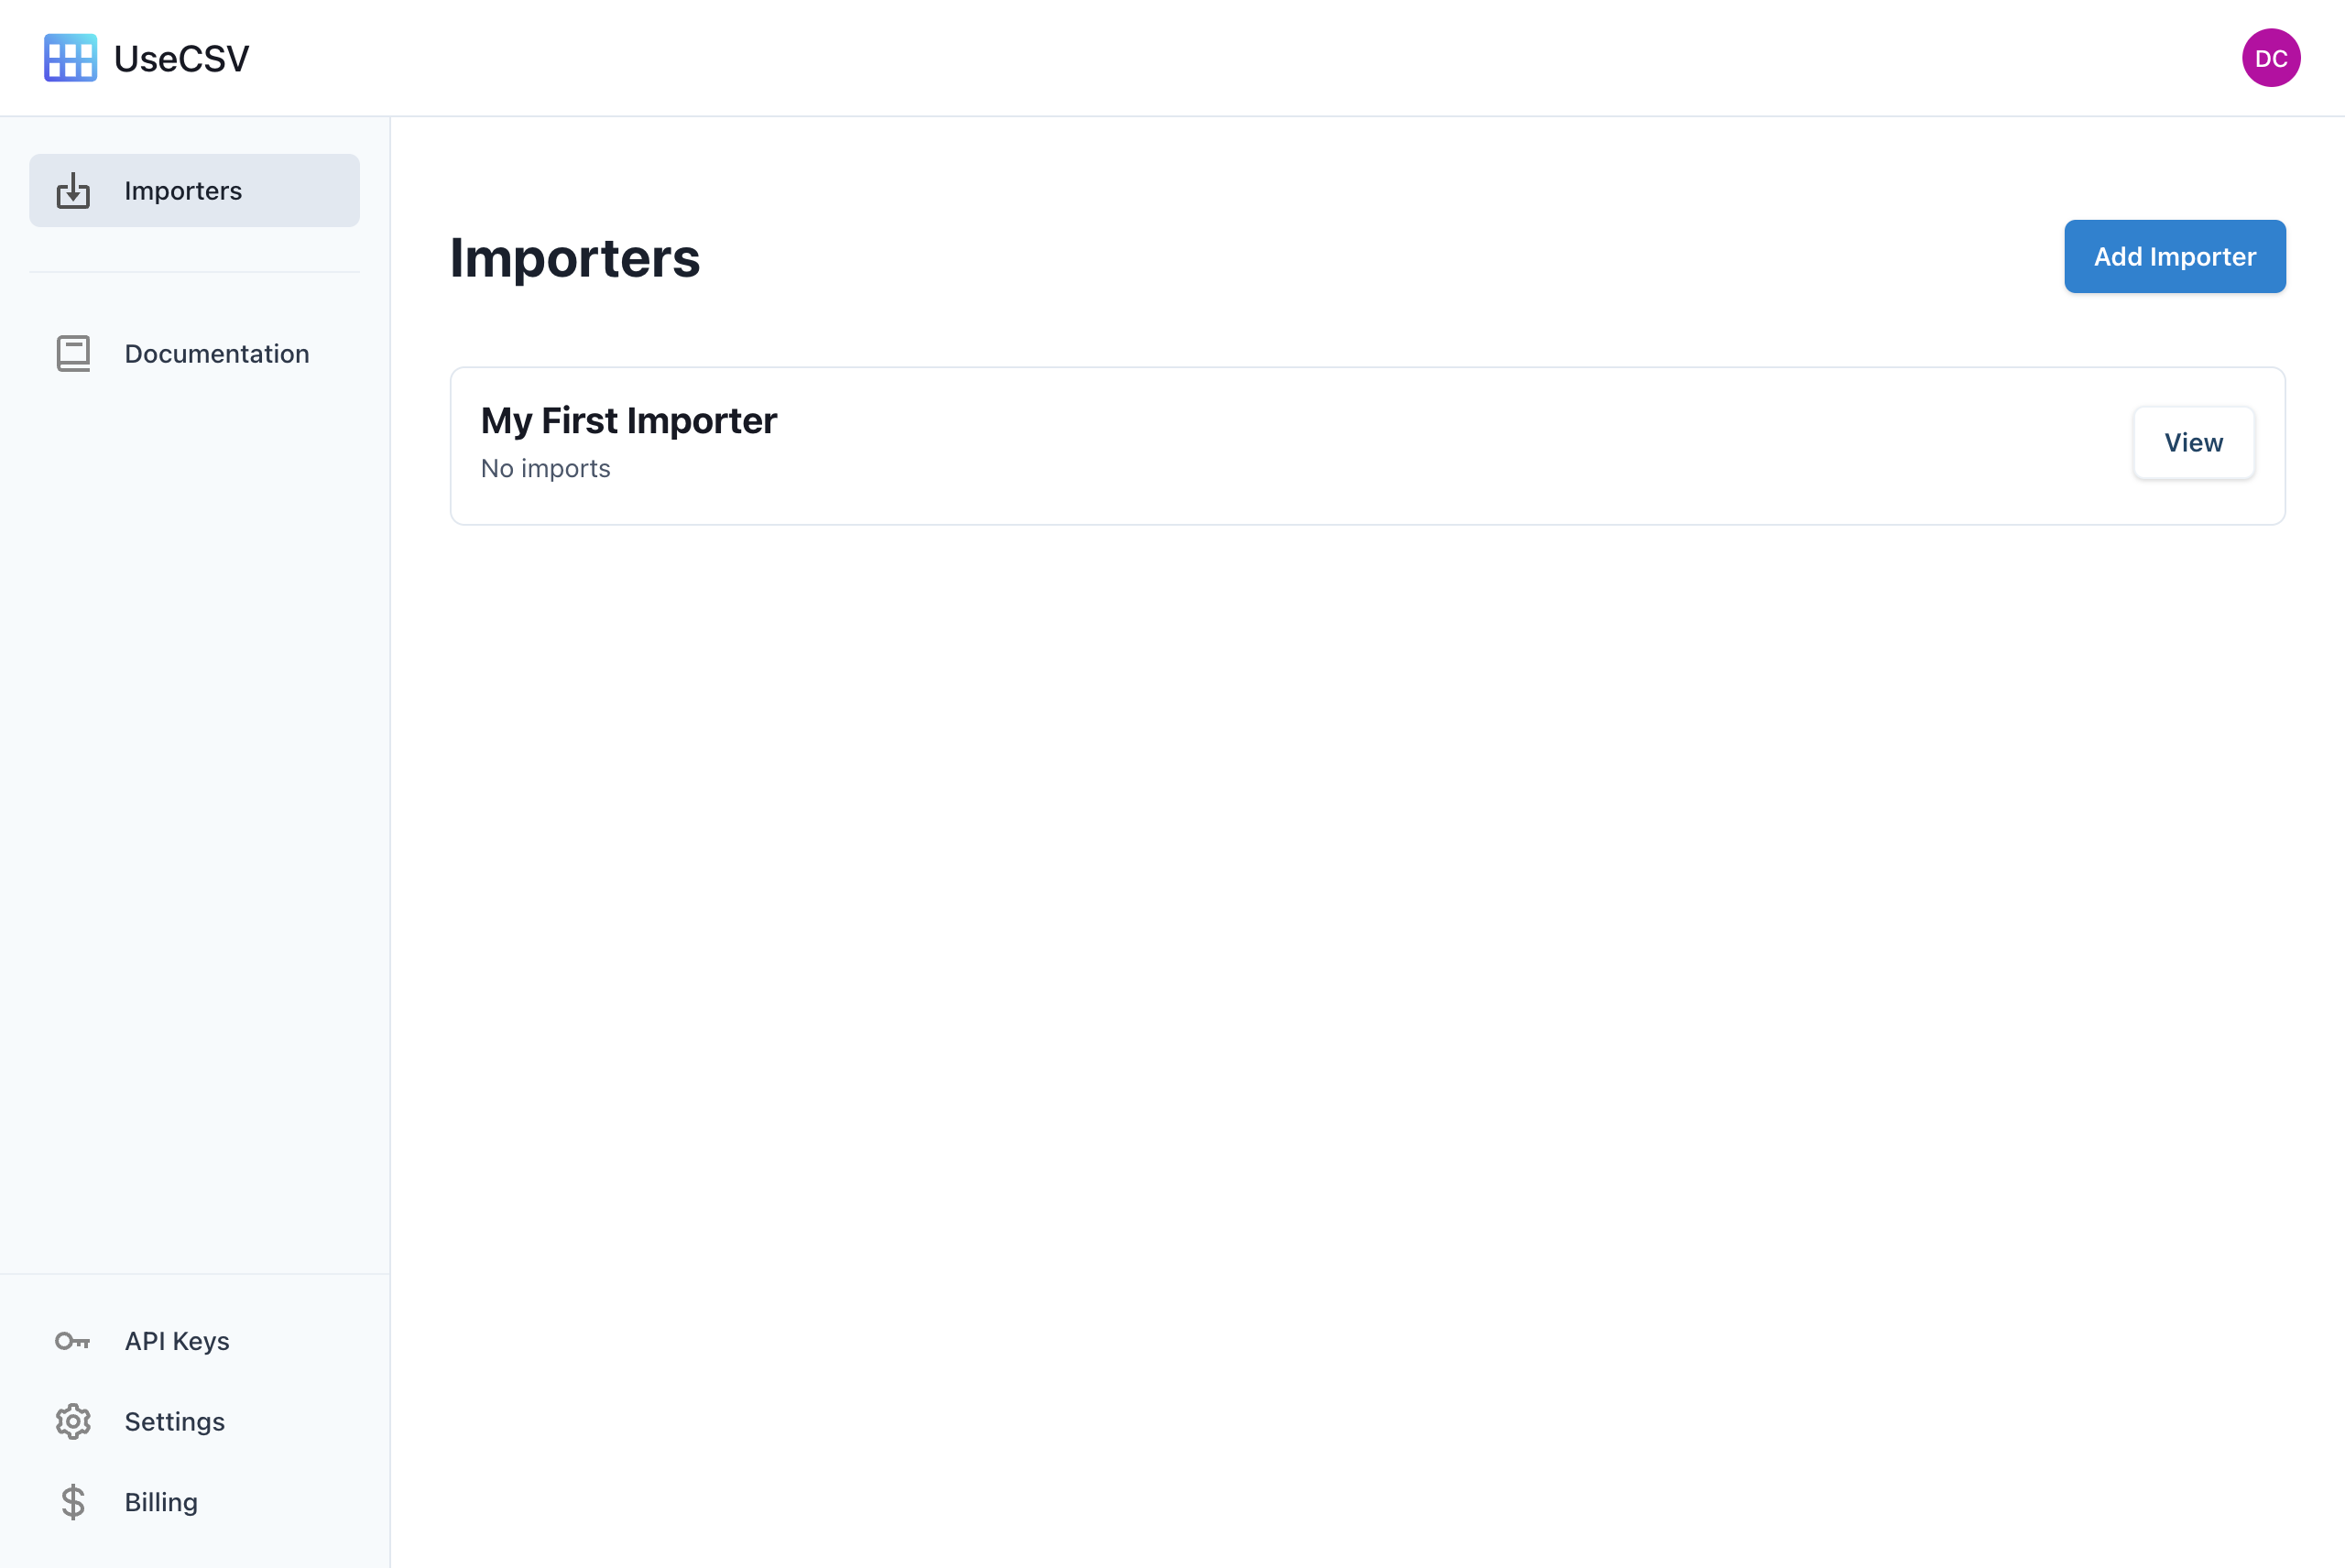
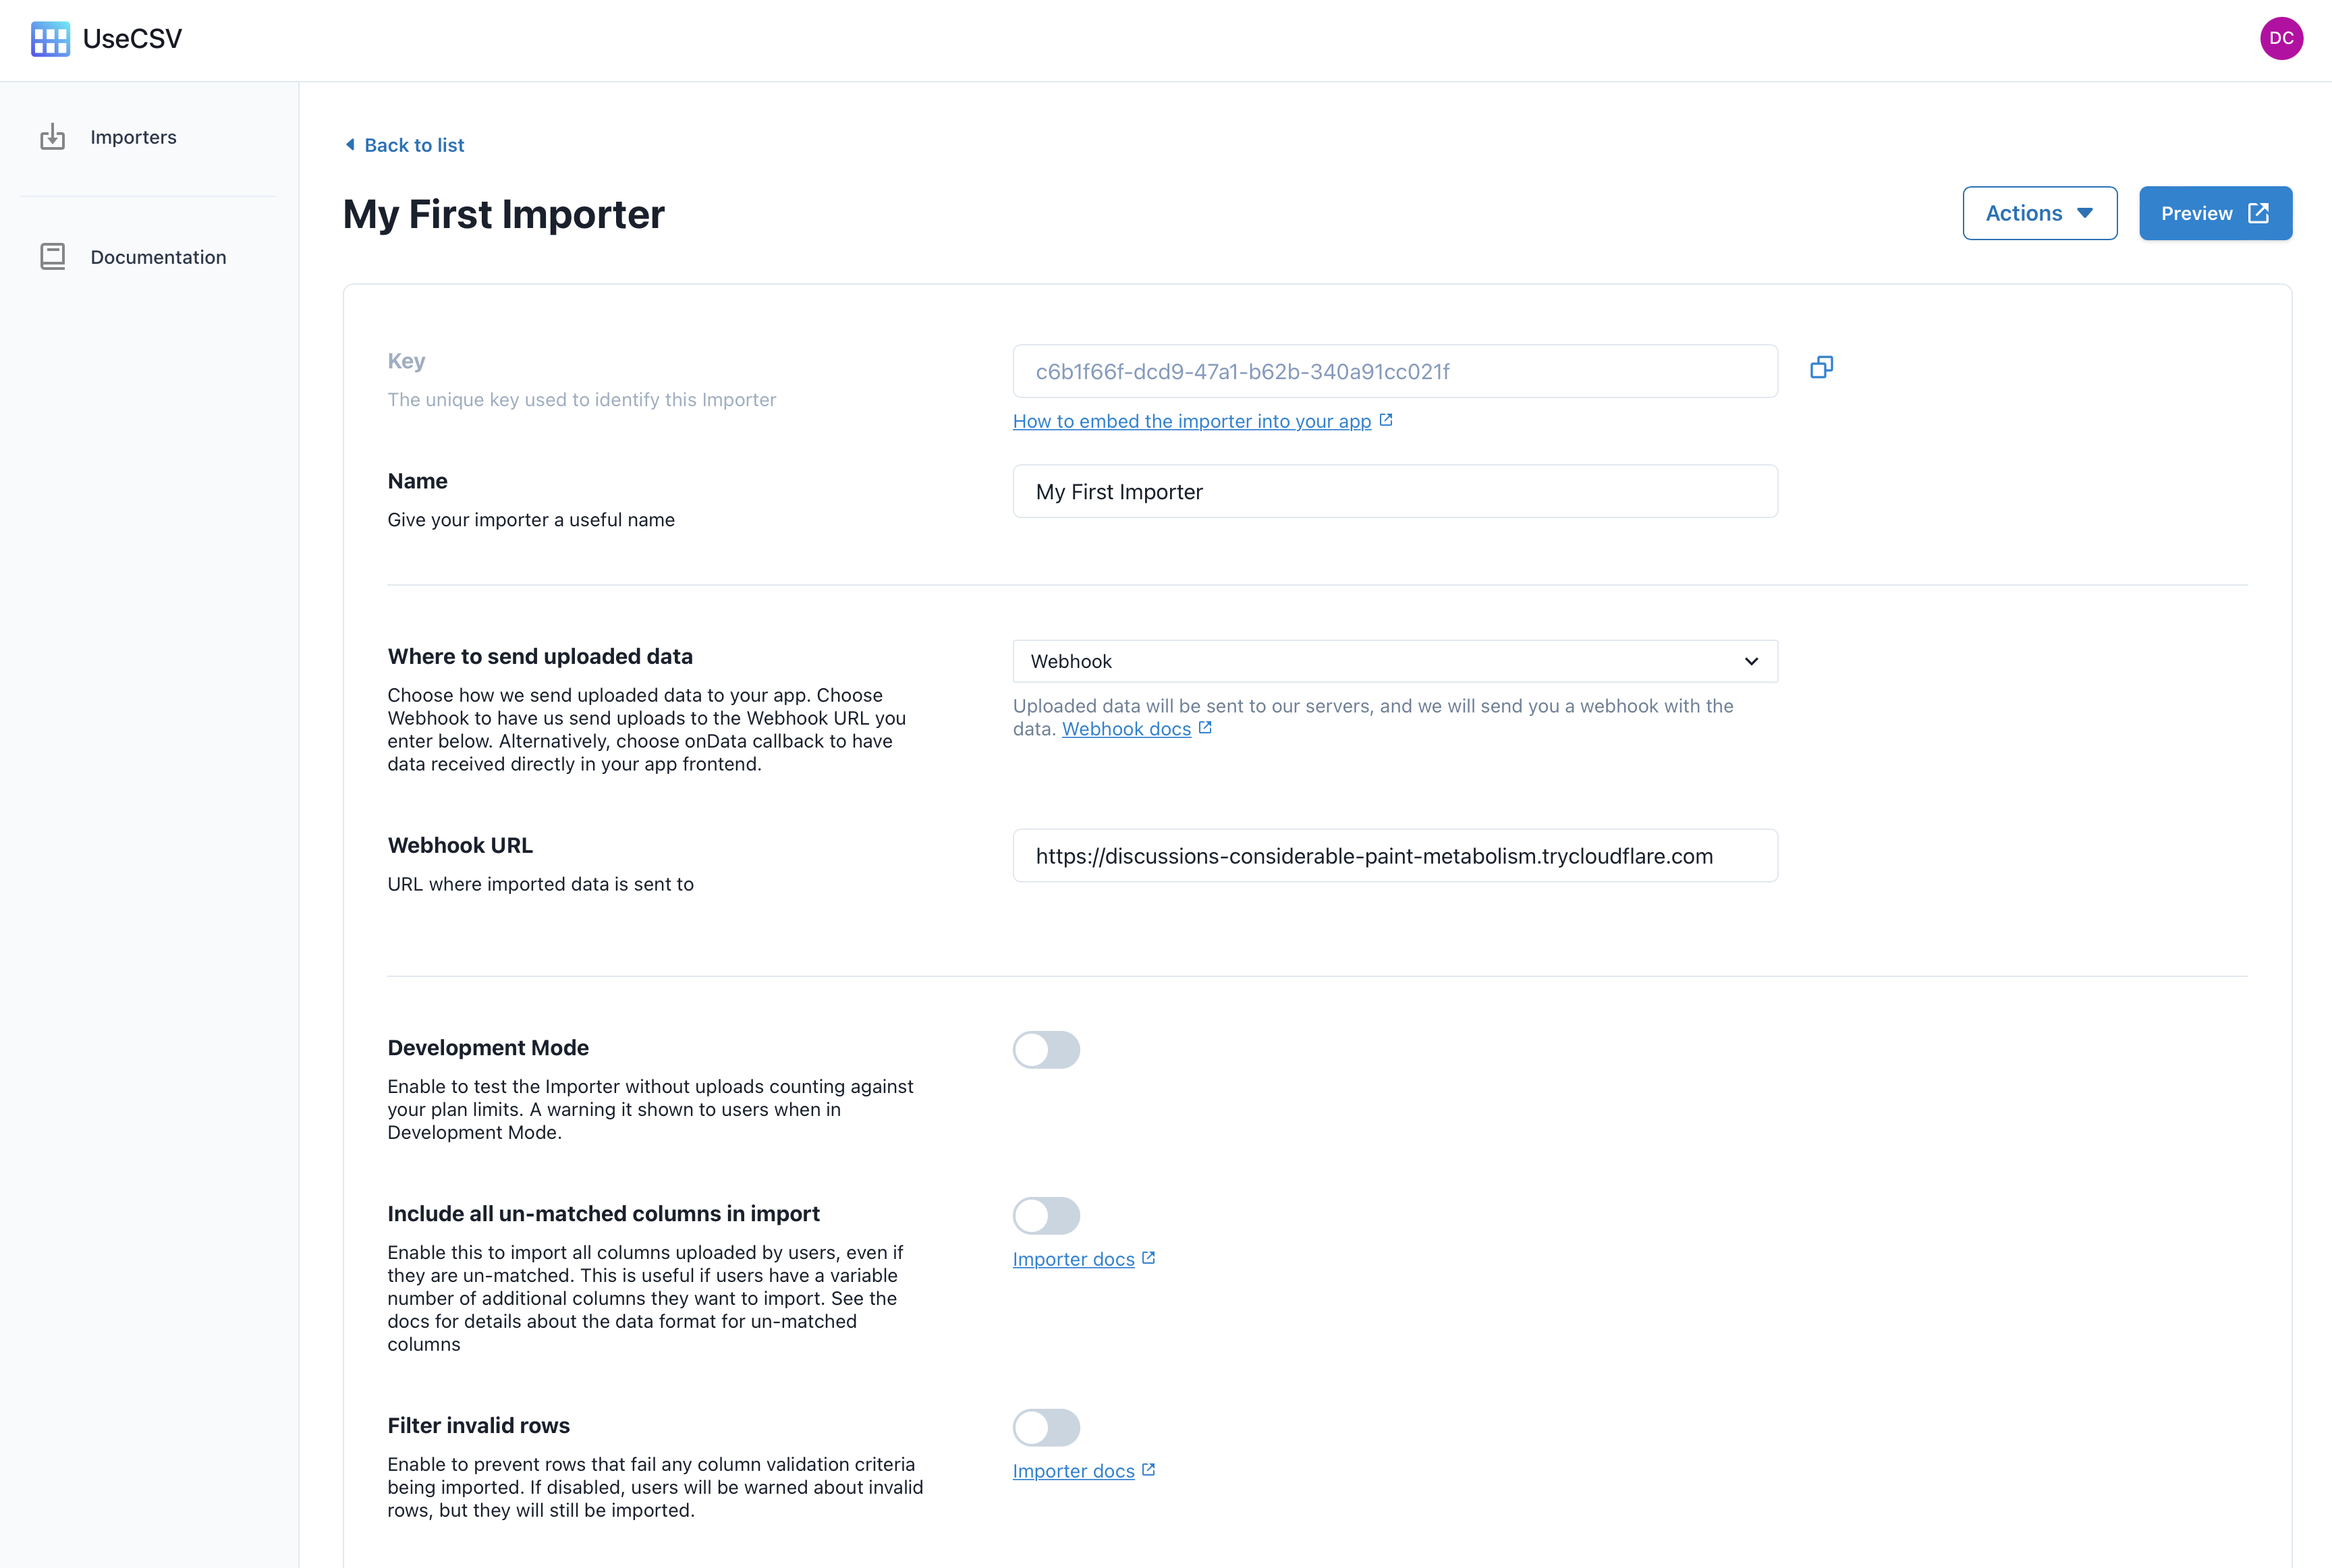
Click the View button. Here you can configure your Importer. Note the Key and Webhook URL fields, we'll need these later on.
Head down to the Column section, where you can setup the data model for this Importer.
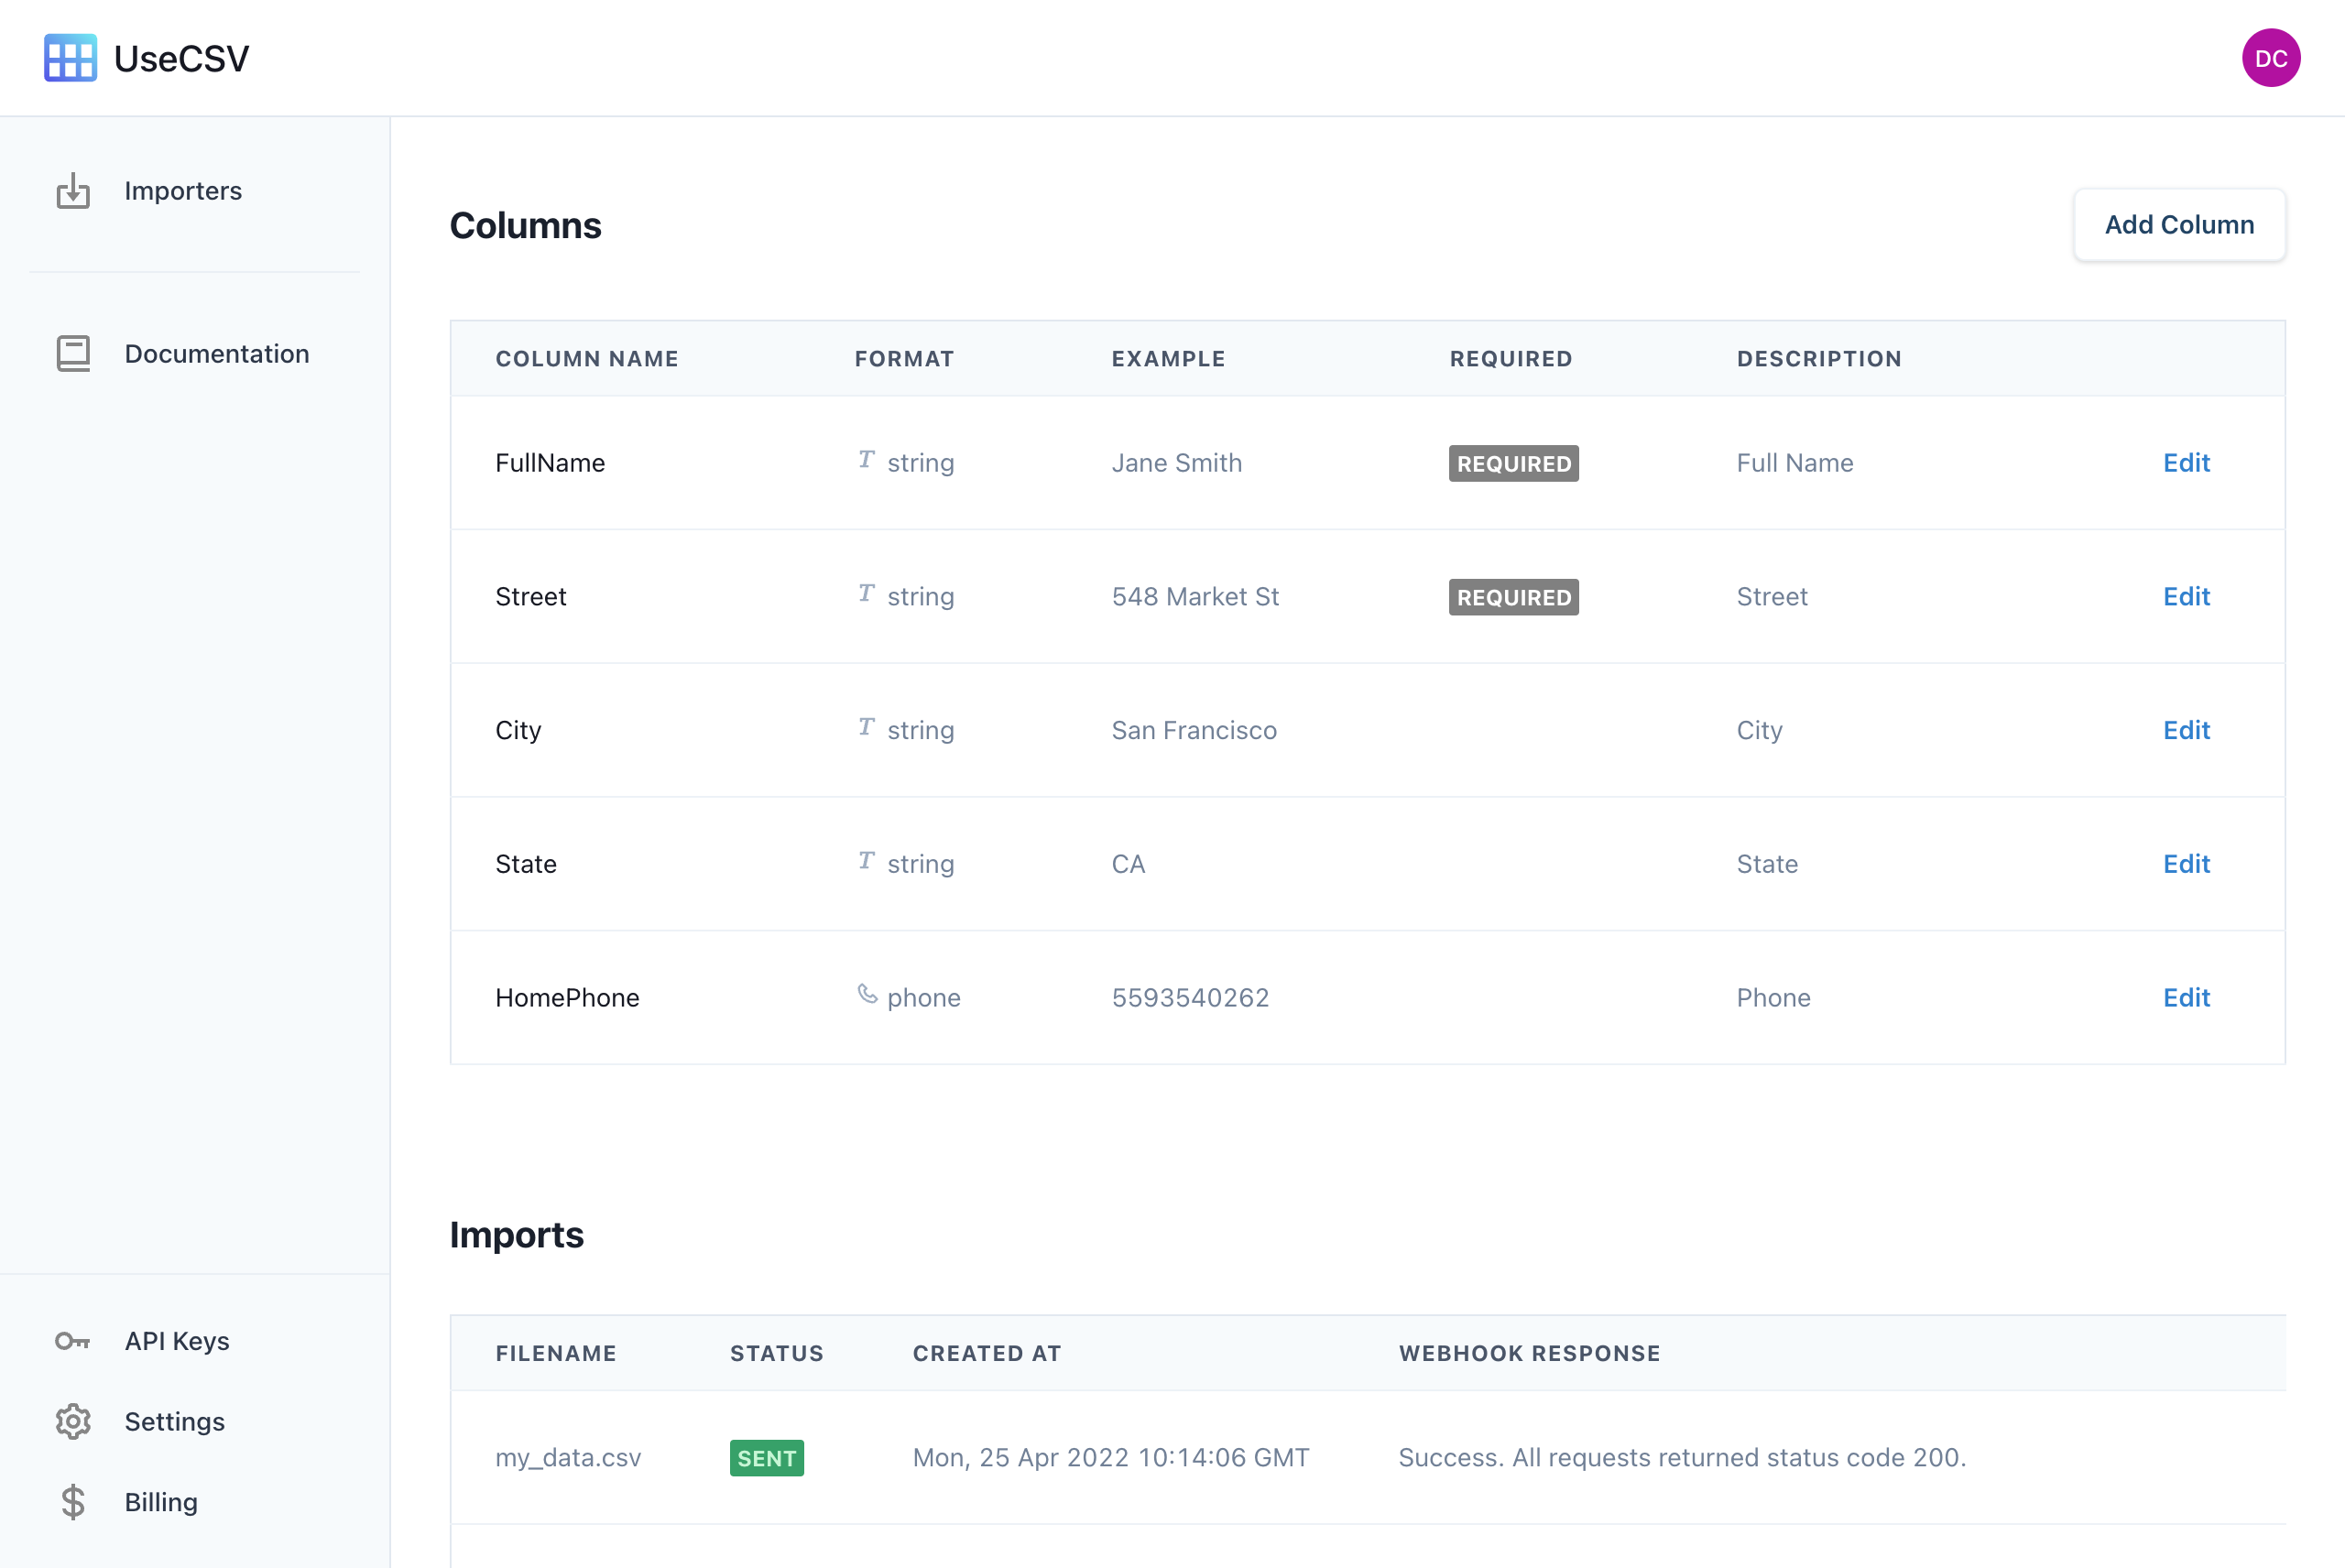
Click Add Column to create a new column, for example you could add a first_name column to begin with. Create as many columns as you like.

Add CSV import to your React app
To add CSV import capabilities to your React app, all you need is to import the UseCSV library into your app. To do this, first start with a basic React app (or, if you already have an app, you can skip this step).
npx create-react-app usecsv-example cd usecsv-example npm start
To integrate UseCSV into your React app, install the UseCSV React library.
npm i @usecsv/react
To add UseCSV React component to our app, use import @usecsv/react and then drop the UseCSV component.
... import UseCSV from "@usecsv/react"; export default function Home() { return ( <div className={styles.container}> <main className={styles.main}> <UseCSV importerKey="INSERT YOUR IMPORTER KEY HERE" user={{ userId: "yourUserId" }}> Import Data </UseCSV> </main> </div> ) } ...
The user param is a JSON object that is passed as an additional data point that is included in the import. This is useful for identifying the data source such as which user it came from. You may use key-pair values if required.
When you check your http://localhost:3000, you will have an Import Data button available for clicking.
Receive data from imports
There are two ways to receive data imports. The first is via a webhook. The second way is to keep the uploaded data local by passing an onData callback function to your UseCSV component. For more information about using the onData callback, check out the documentation for it here.
For this tutorial, we are going to be using the first method - receiving uploads to a Node.js backend as a webhook.
Add the webhook endpoint
To set up and run a simple Node.js server, create a new directory with a file called server.js.
In server.js, we'll start by requiring the http module. This module will give us the ability to create an HTTP server.
var http = require('http');
Next, we'll create an HTTP server. We'll set it to listen on port 8080.
http.createServer(function (req, res) { }).listen(8080);
Now that we have our server created, we need to write the code that will handle webhook requests. For this example, we'll simply log the request body to the console.
http.createServer(function (request, response) { request.on("data", function (data) { console.log("data", JSON.parse(data)); response.statusCode = 200; response.end(); }); }).listen(8080);
Now that our server is created and we're logging webhook requests, we just need to start it up. To do this, open up a terminal window and navigate to your project directory. Then, run the following command:
node server.js
Once your server is running, you can test it by making a webhook request to your endpoint. If everything is working properly, you should see the request body logged to the console.
To connect this webhook endpoint up with your UseCSV importer, you can use a free Cloudflare tunnel.
Start a Cloudflare tunnel:
cloudflared tunnel localhost:8080
If your Cloudflare commands are successful, you will get something like this:
2022-01-29T23:40:16Z INF Thank you for trying Cloudflare Tunnel. Doing so, without a Cloudflare account, is a quick way to experiment and try it out. However, be aware that these account-less Tunnels have no uptime guarantee. If you intend to use Tunnels in production you should use a pre-created named tunnel by following: https://developers.cloudflare.com/cloudflare-one/connections/connect-apps 2022-01-29T23:40:16Z INF Requesting new quick Tunnel on trycloudflare.com... 2022-01-29T23:40:17Z INF +--------------------------------------------------------------------------------------------+ 2022-01-29T23:40:17Z INF | Your quick Tunnel has been created! Visit it at (it may take some time to be reachable): | 2022-01-29T23:40:17Z INF | https://wan-attract-tin-exposure.trycloudflare.com | 2022-01-29T23:40:17Z INF +--------------------------------------------------------------------------------------------+
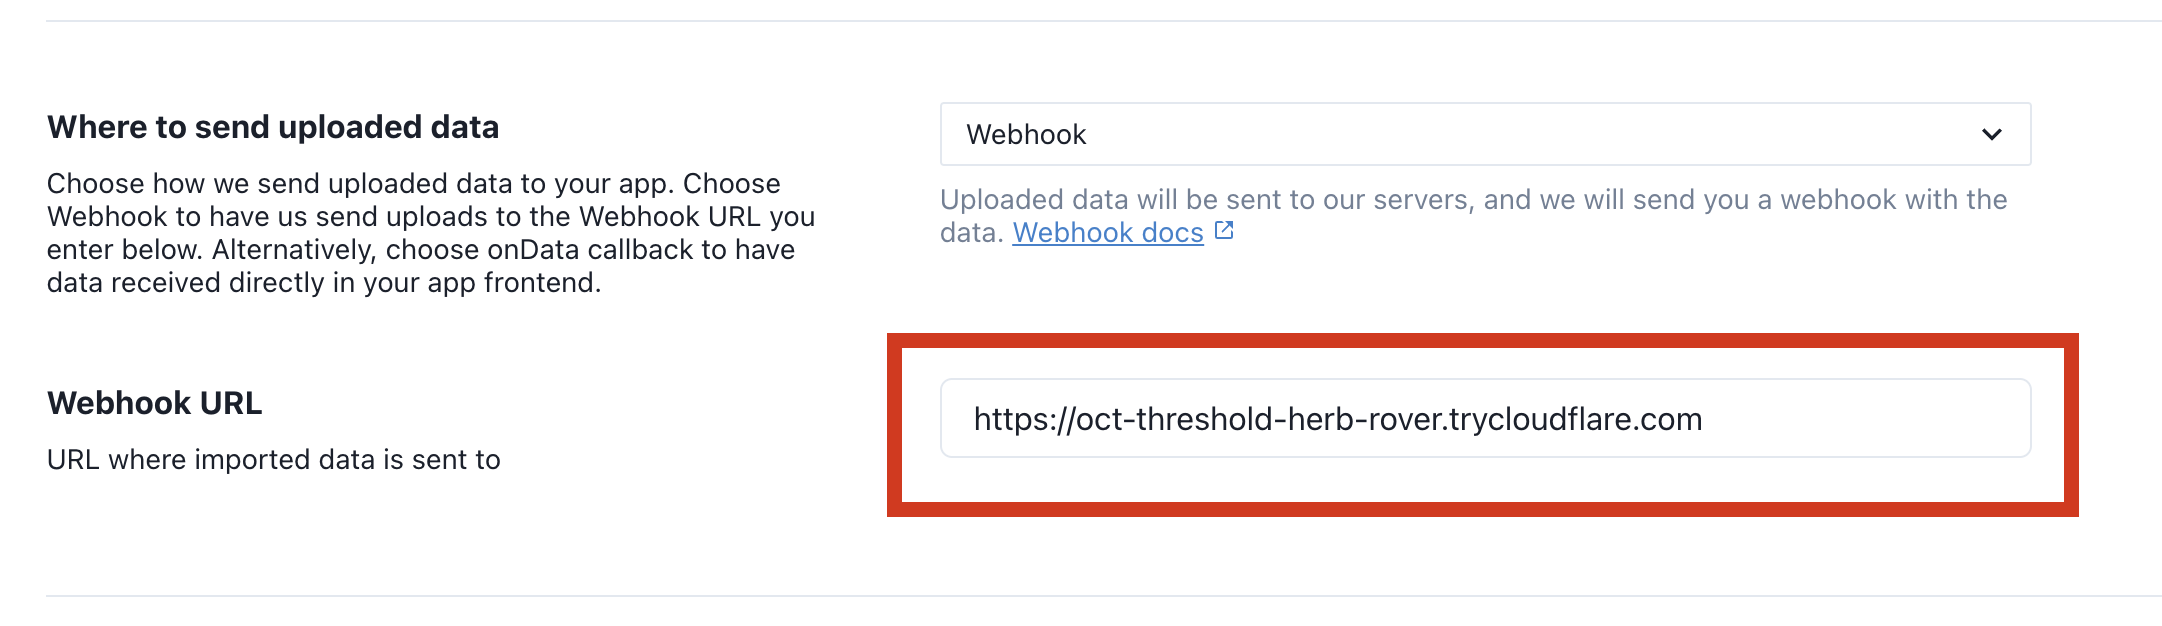
Use the tunnel link and paste it into the Webhook URL field to finish connecting everything up.
We're ready to try your first import
Make sure your React.js server is running with npm run . Go to http://localhost:3000 and click on Import Data to open the importer modal.
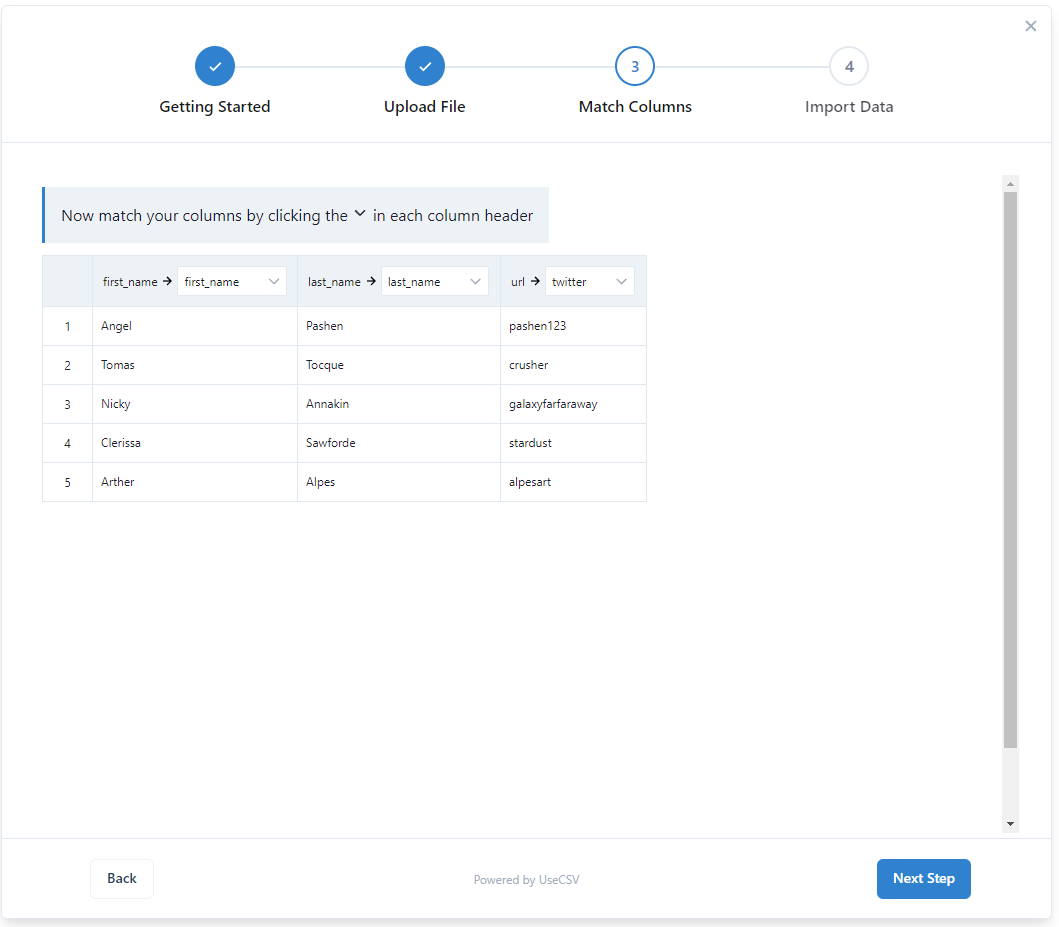
Upload your CSV file, match the columns and then click import.

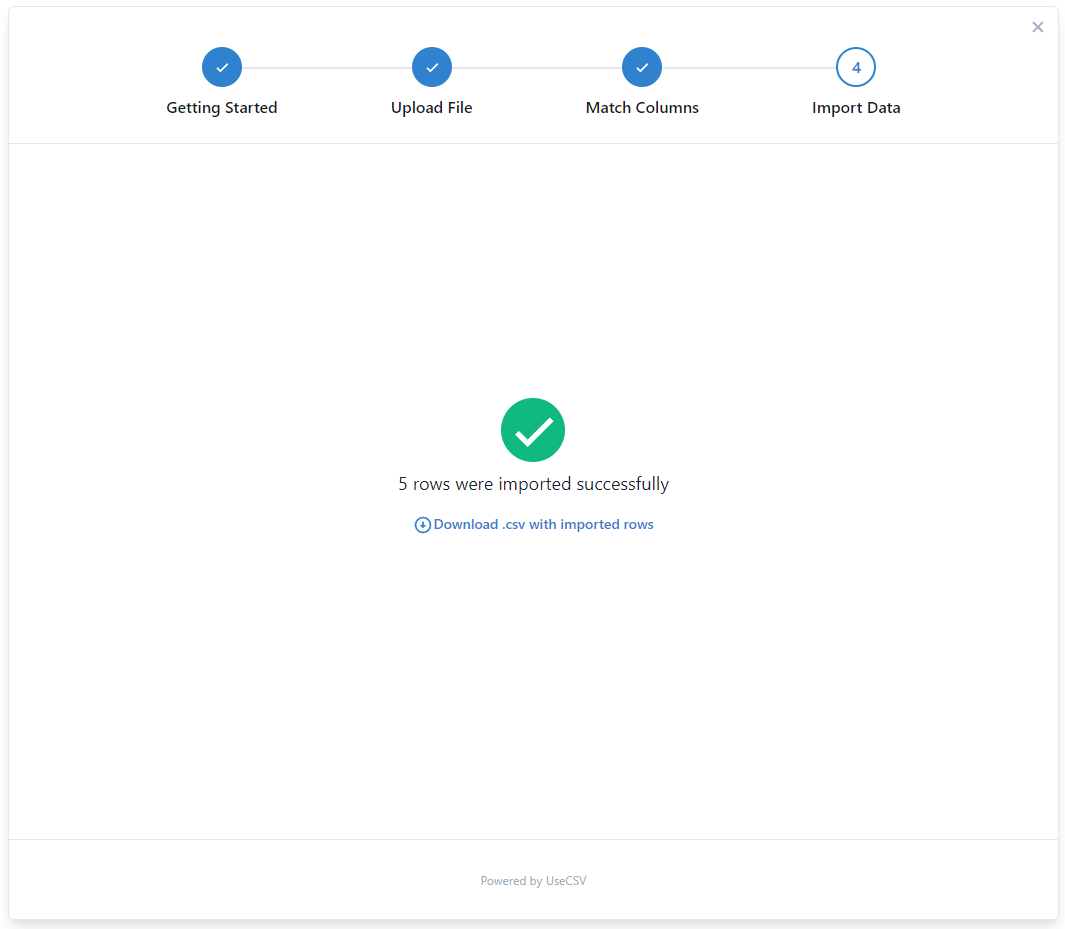
Watch your node.js console log for the webhook payload. UseCSV will automatically split up the webhooks into batches of 1,000 rows.
Here is an example of the payload:
{ uploadId: 999, importerId: 'YOUR IMPORTER KEY', batch: { index: 1, count: 1, totalRows: 2 }, user: null, metadata: null, rows: [ { full_name: 'Jane Smith', review: 'A++++' }, { full_name: 'Joe Blogs', review: 'Loved it' }, ] }
The rows array will contain the imported data with key-pair params being the setup you have in your Importer. The user object will contain any key-value pairs you passed to the corresponding user param in the UseCSV component.
Where to from here?
UseCSV makes it simple to add delightful CSV import to your app. There are many powerful features under the hood including themes and validation rules. Check out the docs for more info.

