
Jan 16, 2026

Adding text-based chat to a Next.js app takes an afternoon. Adding voice? That can mean debugging WebSockets, tuning VAD, whack-a-moling latency issues across regions, etc.
This template helps you skip all of those headaches.
Vercel's serverless architecture is a natural fit for voice AI when paired with the right infrastructure layer. Your Vercel API routes handle the AI logic. You receive text, you send text. Layercode handles everything else: audio transport, pipeline orchestration, voice activity detection, turn-taking, session management, and observability at the edge.
Webhooks auto-connect, API keys stay server-side, conversation history persists via Vercel KV, and the backend is under 50 lines of TypeScript.
What's Included
The template runs on Next.js 16 with the App Router and uses the Vercel AI SDK for LLM calls. Layercode handles the voice infrastructure: speech-to-text, text-to-speech, and audio streaming at the edge.
Features:
Real-time voice conversations
Streaming transcripts with partial updates as users speak
Speaking indicators showing who's talking
Microphone selection that persists across sessions
Message history via Vercel KV (in-memory fallback if you skip it)
Editable knowledge base in lib/knowledge.ts
Deploy (in 5 minutes)
You'll need a Layercode account (free tier works), an OpenAI API key, and a Vercel account.
Watch this video walkthrough (~10 mins), or read on for the full instructions:
Step 1: One-Click Deploy
Hit the Deploy button. Vercel clones the template into your account.
Step 2: Add Environment Variables
Vercel prompts for environment variables during setup:
Variable | Where to find it |
|---|---|
| Layercode Dashboard → Your Agent → Settings |
| Layercode Dashboard → API Keys |
| Layercode Dashboard → Your Agent → Webhook |
| OpenAI Platform → API Keys |
You'll need your Layercode Agent ID, API Key, Webhook Secret, and OpenAI API Key.
Optional: Add KV_REST_API_URL and KV_REST_API_TOKEN from Vercel KV for persistent message history.
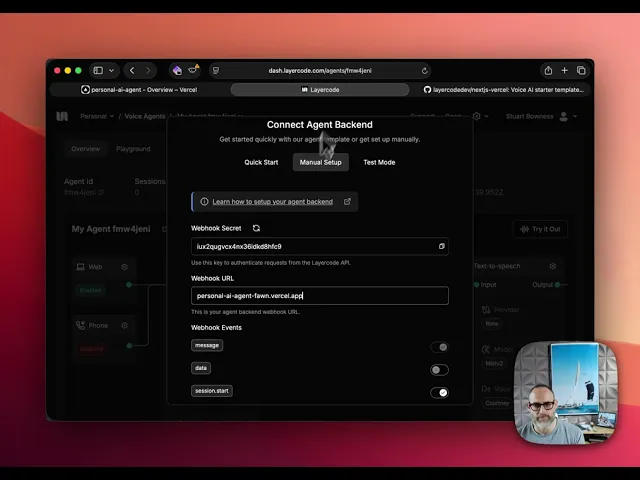
Step 3: Connect Your Webhook
After deployment, copy your Vercel URL. In the Layercode dashboard, set your agent's webhook URL to:
Done. Your voice agent is live.
Try It
Open your deployed app and click Connect. Start talking.
The default template runs as a Layercode support agent. Try asking:
"What is Layercode?"
"How do I get started?"
"What platforms do you support?"
Your speech transcribes as you speak. The agent's response streams word by word. Speaking indicators show who's active.
Customise it
Change the Knowledge Base
Open lib/knowledge.ts:
Edit, push, Vercel redeploys. Your agent now knows your product.
Extend the AI Logic
The voice agent backend lives in app/api/agent/route.ts:
That's the whole backend. If you're using the Vercel AI SDK already, this is familiar. Model swaps, function calling, and RAG all work the same way.
What Else?
Add authentication in
/api/authorizeConnect to your database for personalised responses
Implement RAG with your own embeddings
Extend to phone—Layercode supports telephony, web, and mobile from the same agent
Architecture
You write serverless functions that receive text and send text. Layercode runs on 330+ edge locations globally.
Get Started
Ready to deploy? Clone the template and speak to your voice agent.
Additional resources:
Haven't signed up for Layercode yet? Sign up for a free developer account with $100 in credits to experiment and build your first agent.
